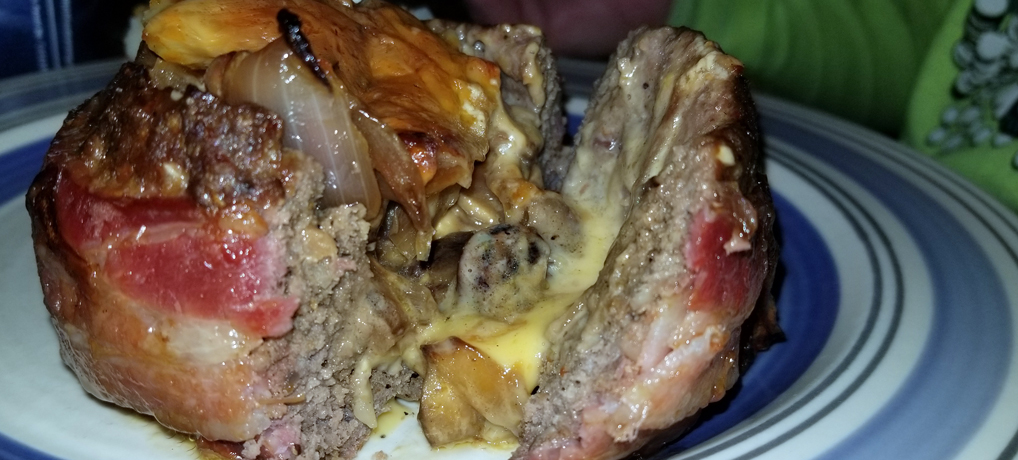
Beer Can Bacon Burgers

Beer can. Bacon. Burgers. Let those words sink in a second and what thoughts come to mind? The most obvious thoughts, bacon and burgers, but where does the beer can fit in to this equation? That’s exactly what I thought when my wife mentioned it to me after coming home from work another great grilling idea. I asked her to contact the gentleman that made them and told her about them for instructions. He was happy to oblige, but over text messaging I had a hard time grasping the concept. I decided to give it a try!

Fresh off the grill and straight to the table! I hope they taste as good as they look!

Using the can! Forming the burger around the beer can takes a little bit of work, but it's worth it.

Creating these isn’t difficult at all. First, take your ground beef (I suggest 80/20 to retain the moisture) and season it as if you were going to make cheeseburgers on the grill. Make a meatball between ½ and ¾ pounds. Next, take the beer can (use an opened beer for sturdiness) and begin to form the burger around the bottom of the can. I found it easier to turn the can over and form it.

Turn the can back over where the mean is now on your counter and press the can down while holding on to the meat. Press all the way until the can feels like it is hitting the counter and continue to work the burger up the side of the can. I kept the walls of the burger about ¼ of an inch thick, maybe slightly less.

Forming the burger around the beer can and wrapping it with bacon.

Next, I took two strips of bacon and wrapped them around the burger. The first strip on the bottom flush with the counter, the second above the first. Once the bacon is secured (don’t worry, it adheres to the burger really well) I used a paper towel to grip the can and carefully slid it out of the burger. The result was a pocket beautifully wrapped with bacon. This thing wasn’t even filled with anything yet but the idea was making my mouth water!

Here is where the creativity comes in! You can fill the pocket with just about anything you want!! Think of whatever toppings you like on a burger and put them in the pocket! This is a stroke of genius!! For me and my wife’s burgers I added a couple of chunks of Velveeta cheese to the bottom of the pocket, then a couple of sliced jalapenos, a handful of caramelized onions and mushrooms, and topped it with a few pieces of colby-jack jalapeno cheese. For my son’s burger, I added a couple of piece of bacon to the bottom of the pocket, followed by chunks of Velveeta, topped with bacon bits, and topped with colby-jack jalapeno cheese.

I set up my Weber E410 gas grill for indirect cooking, and placed the burgers on for an hour and 15 minutes. I cooked them a little too much at that temp for that long as they turned out a little dry, so the next batch will only get an hour and slightly lower temps. The results, even for being a tad bit dry, where AMAZING!!!!

I let them rest for about 5 minutes and then we dove in!! After the first bite I had to ask myself “where has this thing been all my life!!??” They were that good!! With all of the possibilities that can be added to the pocket, I will definitely make these again and again!! They are a great addition to the household menu!


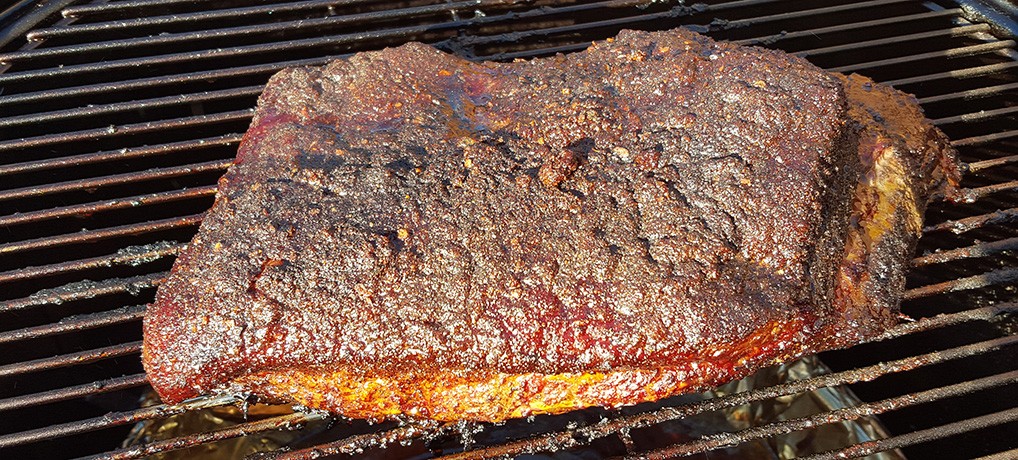
First Smoked Brisket

My confidence was getting better with my smoker, and I knew that I had to try the “holy grail” of smoked meat, a beef brisket! I’ve always believed that any BBQ joint or backyard pitmaster can do a fantastic job on chicken and pulled pork, but the real test is their brisket because it’s so difficult to get consistently right. I’ve had brisket at places that was phenomenal on one visit only to go back and find it dry and not very flavorful the next, so the pressure was on (in my mind) to make something amazing!

I started out with just a flat, the part of the brisket without the point (this site has a good description of what the parts of the brisket, the flat, the point or deckle, are) and gave it a heavy coating of dry rub, wrapped it in plastic wrap and kept it in the refrigerator overnight.

Smoked Brisket

The next morning, after I got my smoker fired up and leveled off to 225 degrees, I added some hickory chunks and placed the brisket, fat-side up, on the grate. And then waited… this is the hardest part in my opinion! At the 4 hour mark, I added some water to the water pan because it was almost out, only about an inch left. I also added some more chunks of wood to keep the smoke flowing.

After learning about the stall and how to power through it the day before with the pork shoulder, I thought that I didn’t want to take that kind of chance with a piece of meat I’ve never smoked before. I checked the internal temperate of the brisket and sure enough, it was just at 160 degrees! So I wrapped it in heavy duty aluminum foil and placed it back on the grate, this time with fat side down.

The wind had started to pick up and I was having a problem maintaining the heat within the smoker above 210 degrees. At the 7 hour mark, I checked the internal temp, and I was only up to 185, and while I was hoping for 195 or better, it was still a good sign that I had made it past the stall. So I added a few more pieces of charcoal to the smoker, on the outer edges so that the heat would rise up easier, and waited.

Sliced Brisket

Finally, after 9 hours total, the internal temperature had climbed up to 205 degrees! I took the meat inside and let it rest in the foil for 15 minutes. I carefully unwrapped it and placed it on a cookie pan, grabbed a knife, then panicked! I had never cut one of these things before! So I asked my wife if she’d like to give it a try. And she did, and the pieces looked amazing. She was, however, upset that she cut it the wrong way. That’s OK, we learned from it and we’ll cut it the correct way next time! Regardless, it was amazing!! I can’t believe how well it turned out!!! And soon we’re going to smoke another brisket, and maybe we’ll smoke the whole thing!