Latest Notes

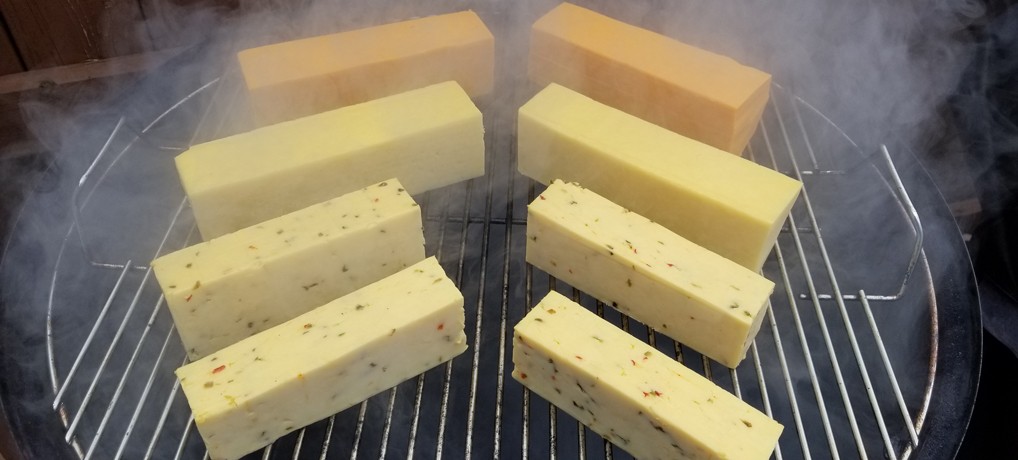
Smoking Cheese In The Weber Smokey Mountain

My wife works in retail, and she came home one day talking about a customer who had brought in some smoked cheese for her to try. She came home that night raving about it! So I asked her to get more details from the gentleman because the idea of smoking cheese seemed absurd to me! How do you keep your smoker cool enough to not melt it?! She came home a couple of days later and began to tell me all about the process of cold smoking. Plus, she brought home a few pieces for me to try, and I got to admit, I was hooked!! It was delicious!!

A couple of days later, a smoking tube arrived from Amazon because, well, my wife ordered it, so I knew it was “game on”! I was excited to give it a try! I loaded up some chips in the smoke tube, lit it, and placed it in my grill. I had a difficult time keeping the chips lit so it didn’t produce a lot of smoke, but the cheese still tasted good. I tried and tried, but still wasn’t producing good smoked cheese that my wife brought home for me to sample. However, I was determined to figure out the best process to do this after many so-so results, and here’s what I came up with!

The Smoking Tube

After having such a hard time with the wood chips the first time, the next weekend I filled the smoke tube with hickory and apple pellets and placed it in the bottom of the charcoal chamber, lit it, and let it go. The pellets produced plenty of smoke! Lesson learned! However, lighting them wasn’t easy that first time! Frustrated, I finally settled on using a small propane torch to get it lit. Another lesson learned! I placed some cheese on the top grate, put the lid on, and waited. Four hours later we had a heavily smoked batch of cheese! Too heavy as a matter of fact! It was really bitter and the smoke covered the taste of the cheese. So much so that we decided to cut the time in half in the future.

However, I didn’t take into consideration how much heat that tube of pellets can produce! After my third or fourth attempt, I opened the lid to find a block had melted through the grates! UGH!!! So I learned yet another lesson, put the water pan in with about a gallon of water! Yeah, I know, I should have been doing that from the start!!

Water In The Pan

After the cheese comes off the smoker, I wrap in plastic film, place it in a Ziploc bag, and then put in the fridge for 1 week. The smoke flavor is way too strong when it first comes off the smoker. Wrapping it in plastic makes the smoke penetrate the cheese and gives it time to settle down and blend in. Trust me, the wait is totally worth it!!

Smoked Delicousness!

Now, whenever I smoke cheese, I’m getting great, consistent results! We have found that smoked sharp cheddar, mozzarella, Colby-Jack, Monterrey Jack, and Swiss are our favorites! I let the cheese smoke for 2 hours, and my wife and I decided that we like apple smoked cheese the best. Hickory is just too strong for cheese in our opinions. Maybe I’ll try some cherry in the future?

I never thought that smoking cheese would turn out this good, and was so easy to make! In the end, I’m glad my wife came home from work excited about smoked cheese. Now we have turned all our family and friends on to it and they love it just as much as we do!

Latest Notes

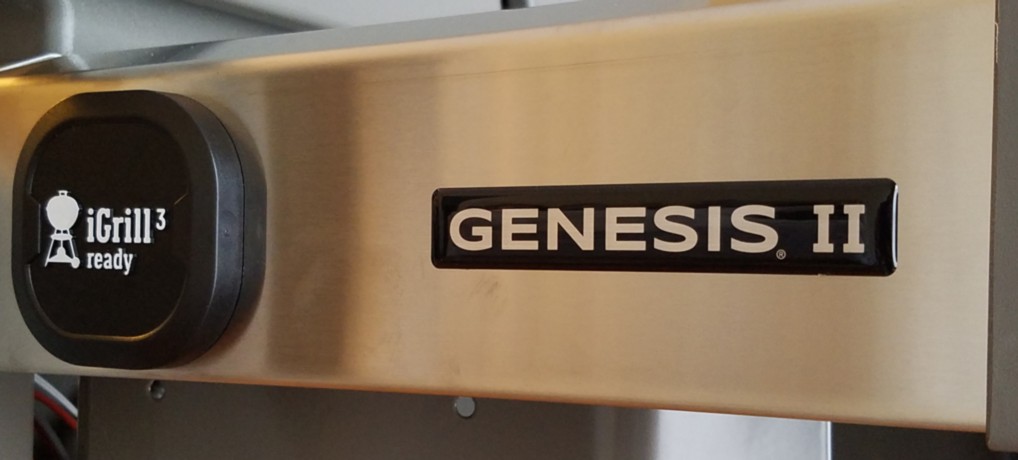
Assembling A New Genesis II E-410!

Not only do we enjoy smoked meat at our house but we grill out a lot! Weather doesn’t bother me when it comes to grilling as I’m out there in the snow and rain cooking something delicious! I don’t care if it’s 20 degrees outside! When my wife and I get the urge for grilled chicken or a burger I’ll fire up the grill and put my coat on!

Unfortunately, nothing lasts forever and all of the grilling and weather was taking its toll on my old faithful Brinkmann gas grill, and with the company going out of business it was getting increasingly difficult to find new burners. It finally got to the point where I had two hot spots on the entire grill so I decided to get a new one but I was going to wait until spring. I was going to use the remainder of winter to shop and compare different grills. However, my wife had other plans as she knew that I had been looking at grills for a while and was really leaning towards a Weber when she surprised me ordered a new Weber Genesis II E-410 for Christmas!

Delivery

She had it delivered to our house so that I could assemble it. Let me just apologize to the delivery company now! That box was 190lbs, and it was on a wooden pallet, so I’m sure that whoever delivered it wasn’t happy. I didn’t want to assemble it outside because I didn’t want to drop anything during assembly and the weather wasn’t cooperating very much. My son and I took it off of the pallet and into the house where I could put it together on Saturday. My daughter came to visit and became my assistant for the day.

Assembly

The box shows a picture of two people lifting the firebox and lid out. That, I discovered, is there for a reason! The firebox and lid are heavy, and the lid is the heaviest piece of the grill, so it was great to have an extra set of hands as I don’t think that I would have been able to do it on my own. I laid everything out to make it easier to find and read through the installation instructions to familiarize myself with the assembly. Overall, assembly took about an hour and half.

I was surprised to find that Weber ships plastic washers that are used with the screws. I can’t help but wonder how long will they last given the heat of summer. It makes me think that they will break in a few years causing the grill to become wobbly. With Weber’s reputation as building solid, long lasting grills I would have thought that metal washers would have been included especially when you consider the price of Weber grills.

Another thing that I found odd is that the tank storage is held together by just sliding down the sides into little slots and plastic rivets holding them in place. While it seems firm now, as with the plastic washers I mentioned, how long will these rivets last making the sides even more flimsy? In the future, if they do fall out I’ll just put a nut and a bolt in their place to hold the sides in place. But in my opinion Weber shouldn’t have skimped on a few cents worth of hardware.

I will say, however, that even with the use of plastic washers and rivets the grill is as solid as an Army tank! I was very impressed with how sturdy it feels now and I hope that it stays that way for years to come. I was also impressed with how easy the lid opens given its weight. Just shows that the engineers at Weber know more than I do about designing these things!

Initial Burn-In

The GS4 Infinity Ignition System is amazing out of the box! After hooking up my LP tank, I turned a burner to the ignition point, pressed the button, and in one click the burner ignited. That’s what a gas grill should do! Weber recommends setting all burners to their highest setting for at least 20 minutes on the first ignition and letting it get as hot as possible to burn off any residue on the inside. I debated on seasoning the grill or not and decided not to so I just fired it up and let it get as hot as it could get. 20 minutes later, it was up to 600 degrees with an ambient temperature of 50.

First Grill

The following day all of the family was over and the discussion turned to what should we have for dinner and it ultimately ended with cheeseburgers, perfect for the first cook! After prepping the burgers, firing up the Weber and letting it come up to what I thought would be the optimal temperature (300 degrees) I lifted the lid and was very impressed with how even the heat felt across the grates using the old “hand-hover” method. It was amazing to feel heat everywhere, something that I don’t remember feeling before on cheaper gas grills that I have owned in the past. The burgers turned out amazing, and maybe I cooked them with the heat a bit higher than I was used to, so I’ll have to adjust that for the future.

Overall Thoughts

I’m thrilled to have added another Weber product to my backyard BBQ arsenal! The Genesis II E-410 looks great, is solid and sturdy, and heats up quickly. Even the wheels feel smooth and sturdy and it rolls around with ease! I’m hoping that it will provide years of great grilling, and because it’s a Weber, I know that I’ll be able to get replacement parts for it in the future. With a 10 year limited warranty, I’m hoping that I won’t need parts anytime soon. I wish that Weber would have included a grill cover with it like they did for my Smokey Mountain Cooker, especially considering the price of the grill and the cover itself! Guess I have another purchase to make.

Chicken

Smoked Chicken Wings

It’s getting to be that time of year again, the time when football is all everyone talks about in Tennessee and there’s not one person in our house that complains about it! And it doesn’t matter if it’s Hendersonville High School, college, or pro football, one of the best foods to go along with it is Buffalo Wings! My wife and I love eating wings and having some cold beers to wash it down on Sunday afternoons while we watch whatever game happens to be on the TV, so it was only natural to try out some wings on the smoker!

For my first batch of wings on the smoker I decided to use 3 different rubs. The first rub is my stand-by for smoking chicken breasts, the second rub is what I use on just about everything else, and the third rub was one i made out of a cookbook. I split about 10lbs of full wings into three groups and seasoned each group accordingly.

First batch of wings on the Weber Smokey Mountain Cooker along with some smoked jalapeño sausage!

After getting the WSM up to a consistent 250 degrees I placed them on the smoker and placed a couple of chunks of apple wood on the charcoal for flavor. 90 minutes later, this is what they looked like.

I took the jalapeño sausages and bacon wrapped pork tips off the grate and took them inside for an appetizer. Seriously, that sausage can be a meal all by itself!! Then I took the chicken wings and grate out of the middle section of the Weber Smokey Mountain Cooker, took the middle section out, and placed the grate and wings on top of the bottom portion with the coals to crisp up the skin on the wings. My tastebuds won out, however, I took the wings off after only 5 minutes and they didn’t crisp up to our liking. But they sure were delicious!

My wife and I couldn’t tell much difference between my stand-by rub and the rub I made up from the cookbook (2nd and 3rd rubs mentioned above) other than one was slightly spicier than the other. We did, however, notice a big difference between those two and the first rub mentioned above. Obviously it wasn’t spicy but had a real good smokey chicken flavor. Combined with my homemade BBQ sauce it was our pick as our favorite!

Wings with a coating of my standard chicken rub and 2 hours worth of smoke.

So today I decided to try another batch using just the chicken rub, and I decided to let them smoke 30 minutes longer, and this is what they looked like! I then used the same method as the first attempt to crisp them up by placing the wings and grate directly above the coals. I smothered all but the five wings on the left with my BBQ sauce and let them sit for 7 or 8 minutes. I then flipped them over and let them sit another 7 or 8 minutes and then placed them on a baking pan and took them inside.


The BBQ sauce burned up a little bit (ok, maybe more than a little) but the flavor was amazing!! We have decided that this is a method that we’ll use again but I will only apply the BBQ sauce about 5 minutes before they come off so that they don’t get burned up as bad. And with football getting into full swing next weekend I’m already excited to smoke more chicken wings!

Wings after 15 minutes directly above the charcoal to crisp up the skin. Notice the 5 on the left that didn't get any BBQ sauce?

Latest Notes

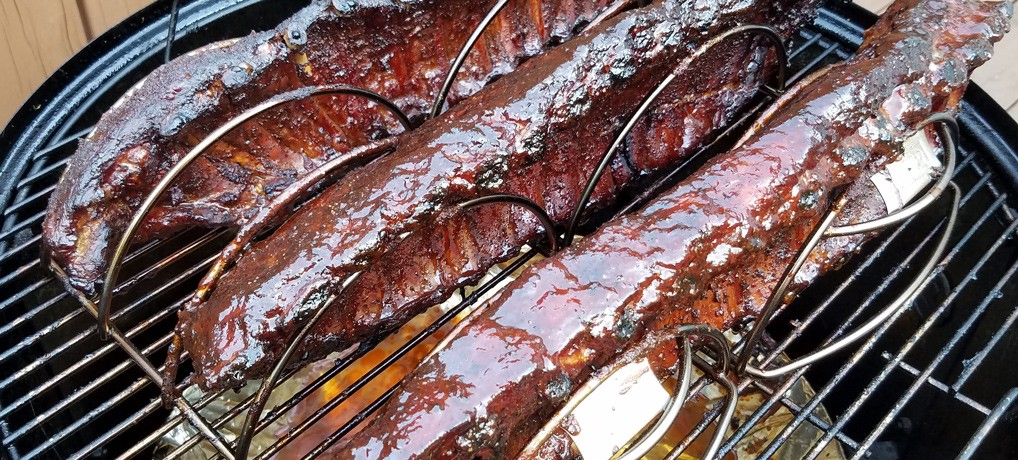
First Pork Ribs Experiment

Pork ribs! Just hearing it said out loud can make your mouth water with thoughts of messy deliciousness sticking to your fingers as you bite into one of the best meats to ever to be kissed by smoke! According to my wife ribs are one of nature’s most perfect foods, along with potatoes, so it was only a matter of time before I had to try my hand at cooking them in my Weber Smokey Mountain, and the time was now!

Pork Ribs given a heavy coat of dry rub before wrapping!

I went to Sam’s Club and picked up a package of pork loin ribs, brought them home, and coated them up with a heavy coat of dry rub. I then covered them in aluminum foil and placed them in the refrigerator while I prepped the WSM.

For pork I love to use hickory chunks! It gives the meat such a wonderful flavor and I figured if it works for packaged bacon, it has to be good for ribs, shoulders, and tenderloins because after all, smoke is just another ingredient in BBQ! I’ve discovered that soaking the wood chunks in water for an hour or more provides the best smoke to cook with. The soaked wood obviously takes longer to burn which makes the smoke last a little longer.

Three racks of ribs, rubbed and ready for smoke!

Once I had the WSM up to a consistent 225 degrees, I added the wood chunks and placed the three racks of ribs on grates. Weber makes rib racks (which I picked up at Home Depot) and they work great for placing on the smoker. They definitely save space so that all three racks of ribs could go on the top grate.

After 2 and half hours, I took the lid off the smoker to take look. They looked amazing, and the meat was just starting to shrink away from the rib bone so I decided to give them a good heavy bath in homemade BBQ sauce. An hour past and I knew that they were just about finished so I gave them another coat of BBQ sauce, replaced the lid, and waited another 15 minutes before I took them off the grate.

Smothered in BBQ sauce after 4 hours of smoke!

My mouth was watering as I took them into the kitchen and began cutting them into manageable pieces. I had to sneak a bite (one of the benefits of cutting up the meat, right?!) and I’m pretty sure my eyes rolled to the back of my head! At the dinner table, I knew my biggest challenge was to impress my wife. As she took the first couple of bites she said “Wow! These are spicy!” I, too, had noticed that there was a little zing to them, but I have a higher tolerance for spicy foods than she does, so I didn’t think much about it. But the more she ate, the hotter the spice became! That didn’t stop her from eating them, we just agreed to take the spices down in my BBQ sauce and not use so much rub on the next batch of ribs I smoke.

Ready to eat! Look at that smoke ring!

The weirdest thing, however, was when we both ate them the next day (I love leftovers!) and we both agreed that the ribs tasted perfect, not spicy at all! I’m not sure why that happened, why the spice cooled off the next day, but it’s definitely something that I’m going to have to experiment with and find out what made this batch of ribs so hot. And honestly, I can’t wait to try again!!

Latest Notes

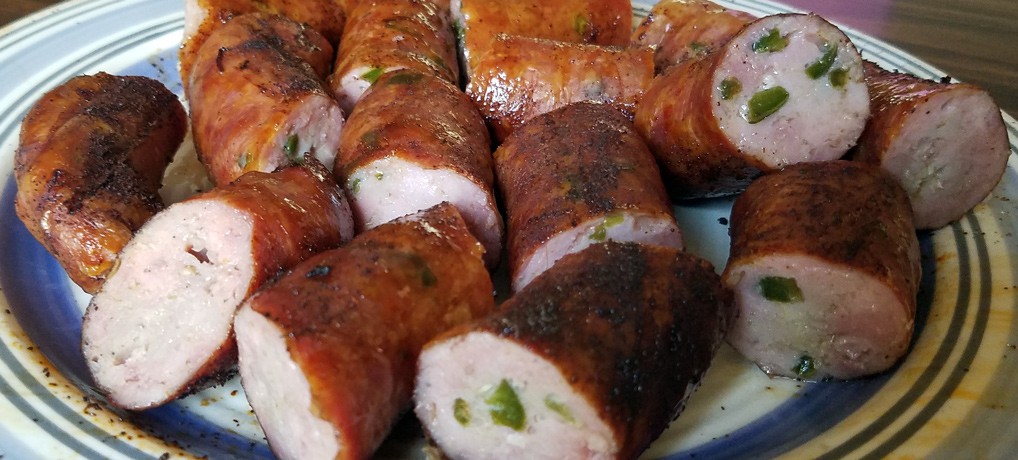
Smoked Jalapeño Sausage

My wife asked if I had ever had hot links before and if I could smoke them. Well, no, I never had them before (gasp!) but after she explained to me that they’re a type of sausage with a little bit of spice and then smoked I figured “how hard could this be?” and figured I’d give it a shot. I love spicy food, and combined with smoke, how could it not be good?

So off I went to Sam’s Club and Walmart to look for some sausage. The challenge in finding the right kind of sausage to use is that my wife suffers from Celiac disease so I have to be very careful when picking out packaged meats. Most prepackaged meats have fillers which contain gluten (a protein found in wheat, rye and barley) and she won’t be able to eat it! Not good, not good!! Unfortunately, I wasn’t able to find anything that I felt comfortable enough to serve her. She knows how to read the labels way better than I do, and the last thing that I want to do is cause her to have a problem with something I cooked!

Frustrated, I went to a local butcher shop to see what was available, thinking surely they have to have fresh cuts of meat, and maybe they have something I can use that’s gluten free. There’s a place in town that’s been here for over a year now, and I have always heard great things about the place, and have even sampled some items that some friends have brought over to throw on the grill that was incredible, but I had never experienced the place on my own. Let me just say I wish I had went in sooner!!!

If you’re lucky enough to have a local butcher then you know what it’s like! G’s Meats ‘N More reminds me of the old style butcher shops from way back when, and the customer service is top-notch! I walked in, on a Friday afternoon, looking for something to make hot links out of. When I talked to the owner George and explained to him what I was trying to accomplish, he mentioned that he had some fresh ground jalapeño sausage in the back that he would be happy to put in the casing for me. I asked for two pounds and away I went!

I was already in the process of smoking two pork shoulders and decided to throw on the sausage as an appetizer. The only preparation I did to the sausage was sprinkling a little bit of chili powder on it. After that, on to the grate it went!

Look at those diced jalapeño peppers!

2 hours later, we sliced it up, and the reaction that my wife had made all of the searching I had done the day before worth it!! It was so good that she made me take a piece back to George, and I didn’t even hesitate because he had to know how good that stuff was! Thank you G’s Meats for making me look like a rock star!! You will definitely be getting more of my business, especially when we want some more smoked jalapeño sausage!