Latest Notes

First Pork Ribs Experiment

Pork ribs! Just hearing it said out loud can make your mouth water with thoughts of messy deliciousness sticking to your fingers as you bite into one of the best meats to ever to be kissed by smoke! According to my wife ribs are one of nature’s most perfect foods, along with potatoes, so it was only a matter of time before I had to try my hand at cooking them in my Weber Smokey Mountain, and the time was now!

Pork Ribs given a heavy coat of dry rub before wrapping!

I went to Sam’s Club and picked up a package of pork loin ribs, brought them home, and coated them up with a heavy coat of dry rub. I then covered them in aluminum foil and placed them in the refrigerator while I prepped the WSM.

For pork I love to use hickory chunks! It gives the meat such a wonderful flavor and I figured if it works for packaged bacon, it has to be good for ribs, shoulders, and tenderloins because after all, smoke is just another ingredient in BBQ! I’ve discovered that soaking the wood chunks in water for an hour or more provides the best smoke to cook with. The soaked wood obviously takes longer to burn which makes the smoke last a little longer.

Three racks of ribs, rubbed and ready for smoke!

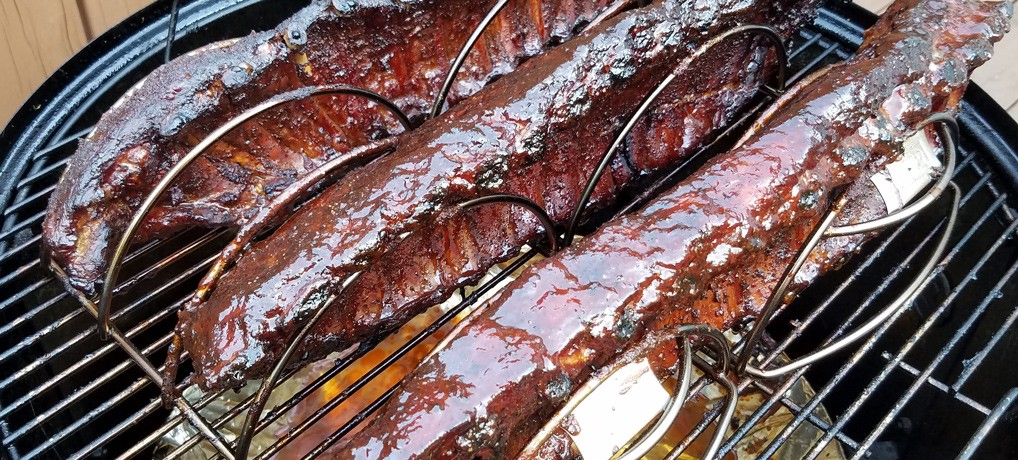
Once I had the WSM up to a consistent 225 degrees, I added the wood chunks and placed the three racks of ribs on grates. Weber makes rib racks (which I picked up at Home Depot) and they work great for placing on the smoker. They definitely save space so that all three racks of ribs could go on the top grate.

After 2 and half hours, I took the lid off the smoker to take look. They looked amazing, and the meat was just starting to shrink away from the rib bone so I decided to give them a good heavy bath in homemade BBQ sauce. An hour past and I knew that they were just about finished so I gave them another coat of BBQ sauce, replaced the lid, and waited another 15 minutes before I took them off the grate.

Smothered in BBQ sauce after 4 hours of smoke!

My mouth was watering as I took them into the kitchen and began cutting them into manageable pieces. I had to sneak a bite (one of the benefits of cutting up the meat, right?!) and I’m pretty sure my eyes rolled to the back of my head! At the dinner table, I knew my biggest challenge was to impress my wife. As she took the first couple of bites she said “Wow! These are spicy!” I, too, had noticed that there was a little zing to them, but I have a higher tolerance for spicy foods than she does, so I didn’t think much about it. But the more she ate, the hotter the spice became! That didn’t stop her from eating them, we just agreed to take the spices down in my BBQ sauce and not use so much rub on the next batch of ribs I smoke.

Ready to eat! Look at that smoke ring!

The weirdest thing, however, was when we both ate them the next day (I love leftovers!) and we both agreed that the ribs tasted perfect, not spicy at all! I’m not sure why that happened, why the spice cooled off the next day, but it’s definitely something that I’m going to have to experiment with and find out what made this batch of ribs so hot. And honestly, I can’t wait to try again!!

Latest Notes

First Try At Smoked Pork Shoulders

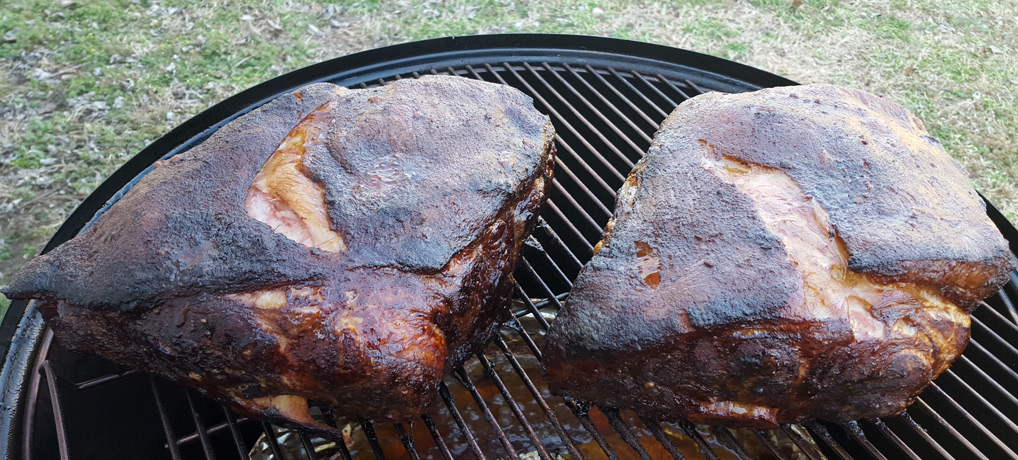
After having seasoned my smoker and following the suggestion of a good friend to smoke a whole chicken first (I wish I would have taken pictures of that bird! It looked amazing and tasted even better!) to get the flavor cooked in to the WSM, I decided to try my hand at cooking a pork shoulder. Not one to do anything at half-speed, I decided that “hey! I got room, why not cook two?!” and so this smoke started taking shape.

It started on Friday night (once again, my wife’s wise recommendation!), when I prepped the WSM with the necessary amount of charcoal in order to get 8 to 10 hours of heat which turned out to be about 12lbs. For the pork shoulders, I coated them with a light coat of honey mustard then gave them a generous coating of dry rub that I found in a cookbook. Man, that rub is amazing, but more on that later! I then wrapped them in plastic wrap and placed them in the fridge.

1st Ever Pork Shoulder

I got out of bed at 4:00 AM and started the fire in the chimney. it was cold outside, around 30 degrees, but I wasn’t going to let that stop me. After learning from my previous attempts to let the charcoal in the WSM burn a little more, I waited 10 minutes after pouring my burning chimney full of briquettes before I assembled the smoker. I filled the water pan with enough hot water until it was about an inch below the edge, placed the grates in place, and covered it with the lid.

After 30 to 45 minutes the thermometer was holding steady at 240 degrees. How accurate is that thing anyway? Probably not very good, but at least it gives me something to go by. I then put in some hickory chips that I had been soaking in water since I started the chimney. Smoke slowly started to escape from the top vent, and it was marvelous! Inside, I unwrapped the shoulders and placed them on the grates fat side up, placed the lid on the smoker, and joined my wife for morning coffee.

After about 3 hours I had to add some water to the pan and some more chips to the fire. The lack of water was causing the temperature to rise to around the 275 degree mark, and I was worried that the meat might dry out. It stabilized to around 225 and the smoke continued.

At the 7 hour mark curiosity was driving me crazy! I wanted to take a peak to see what the shoulders looked like, but to paraphrase what I’ve heard many, many times “if you’re looking, you’re not cooking!” so I resisted. I did notice that the temp had dropped to around 200 degrees due to the wind picking up and the coals burning out. So I added two handfuls of briquettes and closed the door.

Many pitmasters, pros and amateurs, will tell you that meat will top out at a certain temperature before being fully cooked, or as many call it, the stall, and they all have their own techniques for getting past it. I, however, hadn’t heard that, or at least I hadn’t paid much attention to it or forgot about it, but in any event, after the 9 hour mark the internal temp still wasn’t where it should be, it was only sitting at 165 degrees. I checked again an hour later, still it hadn’t climbed above 170 degrees. I closed the lid, added some more charcoal, and came back in two hours.

As luck would have it, when I checked it at 12 hours, it was 200 degrees! Perfect!! I pulled them off the grates, took them into the house and let them set for 15 minutes. Then I began pulling one of them apart (our plan was to freeze the other for a later date) and the meat just fell apart on its own! It was so moist and juicy and the smell was incredible!! Who could resist trying a couple of bites? Not us!! And was it ever delicious!!

Look at that smoke ring!

As our family and guests all were gathered around the dinner table, my wife, who’s tried pulled pork from all over said “Honey, this is the best pulled pork I’ve ever had!” Mission accomplished!!! Even the second shoulder tasted amazing after being frozen and then thawed! With those kinds of result I’m anxious to smoke more pork shoulders!

Latest Notes

Seasoning My Smoker

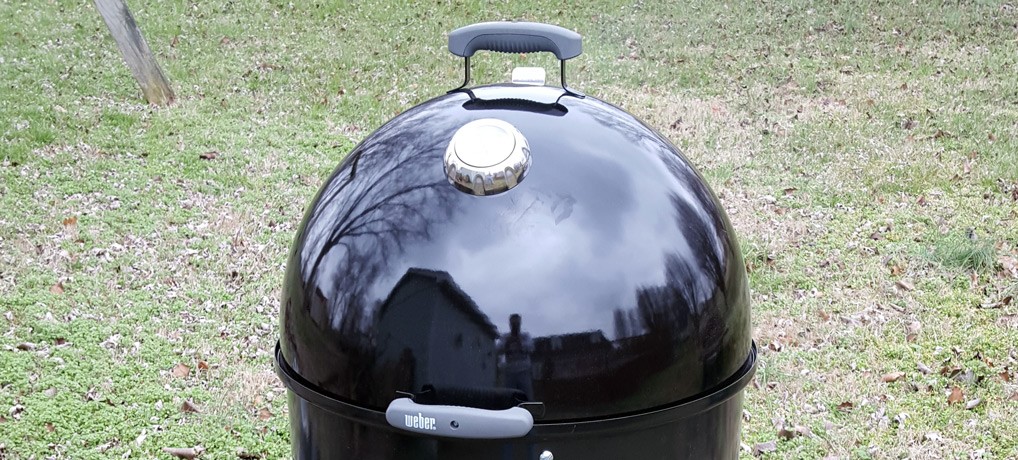
After receiving my Weber Smokey Mountain cooker for Christmas, I finally got a decent break in the weather to do my seasoning. I had read around on the Internet, albeit not enough, and talked to a few people who have smokers on what was the best way to season my WSM, and after taking all of that into consideration I made the decision to put a full 14lb bag of charcoal in it and get it as hot as I could for as long as I could to burn off any residue that was inside from the manufacturing process.

Seasoning Ole SmokeyIt was an overcast day in January, mid-to-high 40 degrees, light breeze, typical weather for middle Tennessee. Around 12:00 PM I filled up a chimney about 3/4 of the way full, lit the paper underneath and waited for the the coals to catch. I then dumped the rest of the bag of charcoal in the bottom and opened up all of the vents. Once the chimney was burning (which took about 10 minutes) I dumped the hot coals on the briquettes. I then assembled the smoker and purposely didn’t add any water to the water pan. I then went inside.

An hour later I check the thermometer. I was only up to 250 degrees. Hmmm…. I was thinking that it should be warmer than that, but I waited it out.

Another hour passes and I checked the thermometer again. 375 degrees! Now that’s more like it! The breeze was starting to pick up so I knew that it would affect the temp and I didn’t anticipate the heat staying that high much longer.

I checked the thermometer at the 3 hour mark and it was holding at 325. Smoke from the charcoal was billowing out of the top vent, and I felt a sense of accomplishment. It stayed at that temp for another 2 hours at which time the charcoal gave all it could and the temp started to fall.

At the 5 hour mark the thermometer was showing 230 degrees, and fortunately, it stayed there for another hour. The end results were a 6 hour burn-in with a peak of 375 degrees. It may have been warmer, but that’s all that I saw.

Afterwards, feeling like I’m ready to smoke any piece of meat out there, I found through more research on the Internet and talking with even more people that I should have put some fruit wood chunks in to get a good heavy coat of smoke on the inside. It was even suggested that I coat the entire contents of the smoker with either cooking spray or olive oil to give the smoke something to adhere to. Had I only known about that when I “seasoned” it!

Oh well, lesson learned, and I’ll probably use some of those tricks on my next smoker!